CLion is a cross-platform C/C++ IDE that natively supports CMake (which ROS Catkin is based on), and also supports Python code.
Creating or opening ROS projects within CLion makes it easy to debug code, execute nodes, and view packages and classes within a ROS workspace in an intuititve way.
More details on the setup can be found on the official ROS CLion IDE page and the Jetbrains ROS setup tutorial guide.
Initial CLion setup
The setup is straightforward:
- Download and install CLion then create an alias by adding the following line to your ~/.bashrc file:
clion="/path/to/clion/clion-2018.3/bin/clion.sh" - Source your ROS workspace using
source ~/robot_ws/devel/setup.bashand from the same terminal run CLion by typing the commandclion. This ensures that CLion is aware of ROS specific environment variables. - Open a ROS project in CLion: File > Open then navigate to the CMakeLists.txt file in your src folder (located at ~/robot_ws/src/CMakeLists.txt) then choose “Open as Project”. The CMake tool tab will show the project loading.
- Set the build paths to the catkin workspace: Navigate to File > Settings > Build,Execution,Deployment > CMake then set the Generations path variable to ~/robot_ws/build and the CMake options variable to -DCATKIN_DEVEL_PREFIX:PATH=~/robot_ws/devel then click Apply. This will build the workspace.
Running ROS launch files and nodes
Lauch files cannot be executed directly within CLion however it is still useful for CLion to recognise them as XML formatted. To set this up, go to File > Settings > Editor > Code Style > File Types. Under Recognised File Types select XML then add *.launch to the list of Registered patterns.
Launch files can be run, as usual, in the CLion terminal using roslaunch package_name filename.launch. To debug specific nodes, simply call Run > Attach to Process to attach them to the debugger.
Before running a node in CLion, ensure that roscore is running in a terminal. Then run your node configuration within CLion which will execute the ROS node.
Adding Git
CLion has a built-in version control menu that can be integrated with Git. Setting this up is straightforward:
- Download and install Git in terminal using the command:
sudo apt-get install git. - In CLion navigate to File > Settings then on the left pane select Version Control > Git. Make sure that ‘Path to Git executable’ is set to /usr/bin/git.
- On the left pane navigate to Appearance & Behavior > System Settings > Passwords. Select ‘In Native Keychain’ then click OK.
Committing and pushing changes
To commit your code changes to GitHub select VCS > Commit or click on the Git commit shortcut in CLion. A commit changes dialogue box resembling the one below should pop up:
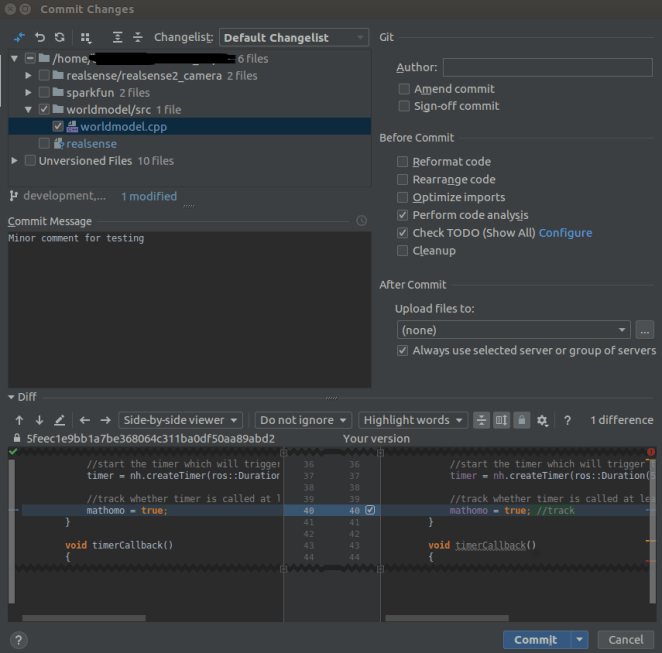
CLion Commit changes dialogue box
Select the folders you want to commit, add a commit message, then click on the arrow next to the Commit button to select Commit & Push. This will bring up the push commits dialogue box shown below:
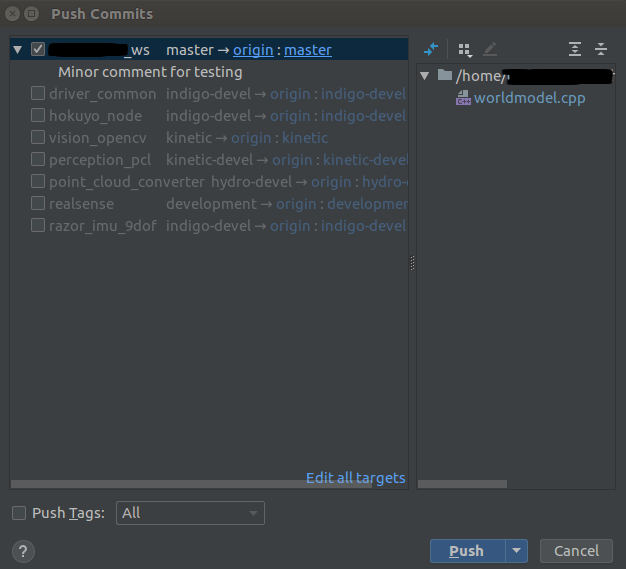
CLion push commits dialogue box
Finally, select the Push button to commit changes from your local repository to your remote repository.
A Git login dialogue box will appear. Enter your GitHub login details and make sure to select Remember password to store your password in the keychain.
Git management tool
The CLion Git tool is quite basic so if you are looking for a more complete Git management tool with GitFlow , try GitKraken.
