Contributing to open source projects can feel very daunting in the beginning. A good way to get started is to contribute small changes such as bug or documentation fixes. Most open source projects publish guidelines which outline best practices and contributors are sometimes invited to attend meetings to discuss the direction of the project. Regardless of where you are located in the world, the community behind the open source project will typically be active on online platforms like Discourse, Gitlab, Github or Slack.
This tutorial focuses on a simple example of contributing a documentation fix to the Autoware.Auto open source project for autonomous driving. The steps shown here can be applied to more complex contributions such as adding new software features. Make sure Autoware.Auto is installed on your computer and that you are comfortable using Git before proceeding.
Contributor guidelines
Most open-source projects are hosted on development platforms like Gitlab or Github. Tickets (Issues), which are created by contributors or end-users, are systematically tracked on the platform. The open-source project will also publish some sort of contributors guide which outlines best practices followed internally by teams. It is important to read and follow such guidelines to ensure that your contributions are processed efficiently.
Autoware.Auto project has a contributor’s guide which outlines topics such as best practices, developing from a forked repository, writing documentation, and naming standards. There is a specific guide for writing documentation for Autoware.Auto which explains the different ways to document (doxygen, html, code comments etc.) the project. Autoware.Auto follows the fork-and-pull model for making contributions which just means that you develop in a branch of your forked repository.
Forking a repository
The first step is to make sure there is an Issue (ticket) associated with the documentation bug that needs to be fixed. In this tutorial we will be working on fixing the “ndt_nodes design doc typo?” ticket that outlined a typo in the Autoware.Auto design documentation. Take note of the Issue number (#1214) at the top since this will be required later.
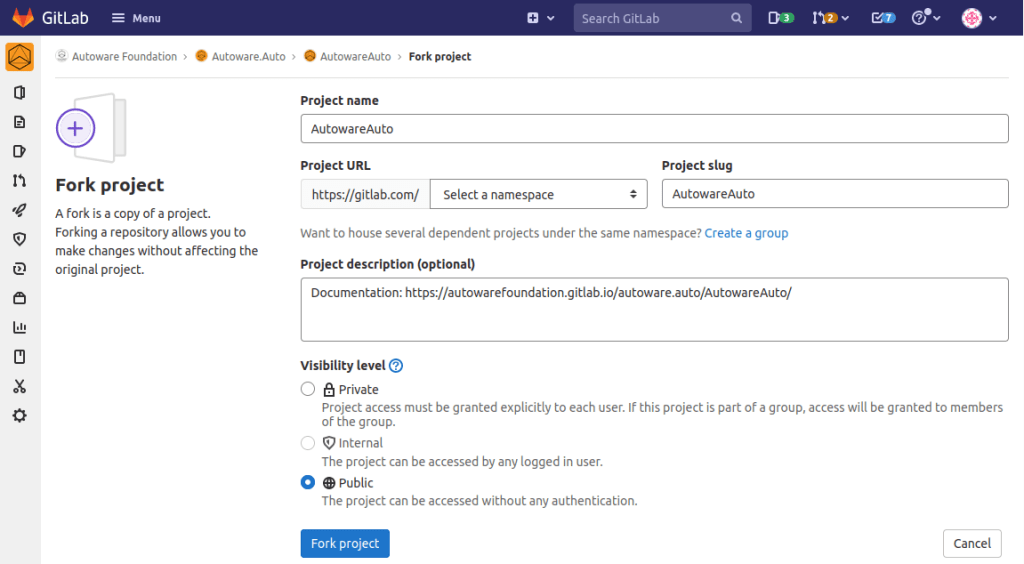
Next, create a fork of the Autoware.Auto repository in Gitlab by selecting the Fork button at the top right hand corner of the Autoware.Auto repository. A fork simply creates a copy of the original project and puts it in another namespace, allowing for experimentation without affecting the original project. Any changes you make can be pushed to your fork and a merge request is submitted to merge your code to the original project.

On the “Fork Project” page, select a unique Project URL namespace (for example your name), add a description, and set visibility level to public. Note that public projects can be cloned without authentication over HTTPS. Click on the Fork project button to complete the process.
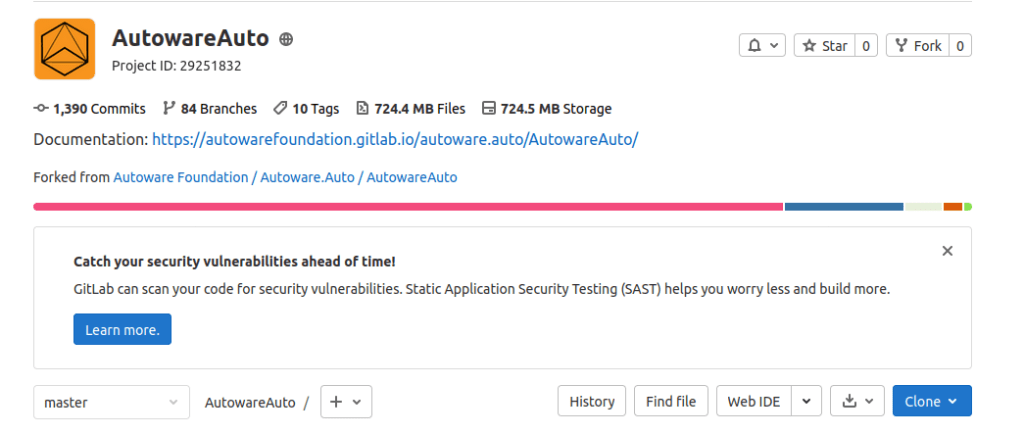
The forked repository will be hosted at https://gitlab.com/<your-gitlab-username>/AutowareAuto (replace <your-gitlab-username> with your unique username). Open your forked project and select the Clone button to copy the address for cloning this forked repository.
Finally, clone this repository to your adehome location using this command: git clone https://gitlab.com/<your-gitlab-username>/AutowareAuto.git. This will make the codebase available locally to the ade container. The remote (forked) repository that the project was originally cloned from is referred to as origin. In this case, the ‘origin’ URL is https://gitlab.com/<your-gitlab-username>/AutowareAuto.git.
Origin and Upstream
We are now ready to set up (only once) aliases for the forked repository and the original Autoware.Auto repository.
In terminal, run git remote add origin https://gitlab.com/<your-gitlab-username>/AutowareAuto.git to link the local folder on your computer to the remote (forked) repository on Gitlab.
In terminal, run git remote add upstream https://gitlab.com/autowarefoundation/autoware.auto/AutowareAuto.git to connect the fork to the original Autoware.Auto repository.
To check which repository URLs have the alias ‘origin’ or ‘upstream’ use the command: git remote -v
CI/CI project settings
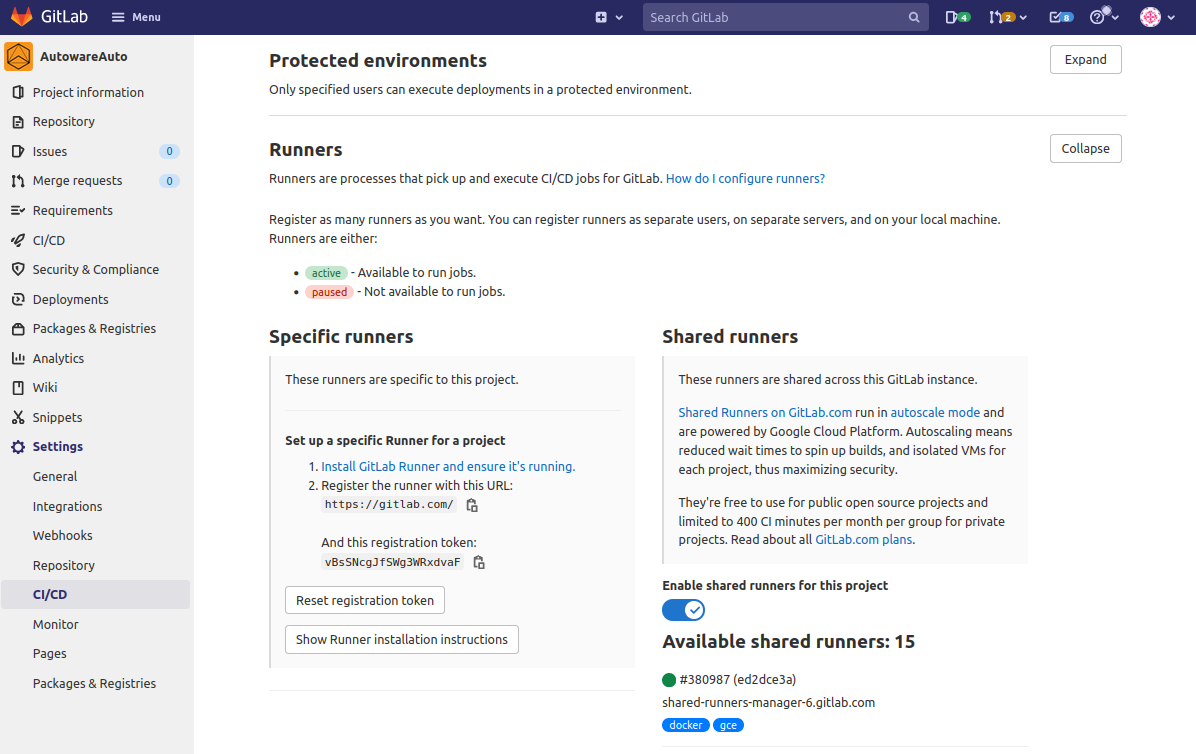
The CI/CD project settings also need to be updated to ensure that the pipleline builds successfully. In Gitlab go to Settings > CI/CD > General pipelines and update Timeout to 3h. Also go to Settings > CI/CD > Runners and select “Enable shared runners for this project”. These settings are needed to ensure that the CI/CD builds for the upstream project. The CI/CD settings required may change from time to time as the project evolves so make sure to get the correct settings from the project maintainers.

Creating a branch
Before beginning development work, create a branch from your fork in which to work. A branch is an independent line of development containing a copy of the files in the repository from the moment you create the branch. Changes made in the branch can then be merged into the default branch of the fork (e.g. master). The branch should be named in the format <Issue#-short-description-of-fix>.
To work on Issue #1214 highlighted above, create a new branch using the command git checkout -b 1214-ndt_nodes-doc-terminology-fix. Terminal will automatically switch to this new branch.
Making changes
We are now ready to fix the documentation bug. In this case, this requires updating the NDT nodes design documentation. The markdown file to be updated is located at adehome/AutowareAuto/src/localization/ndt_nodes/design/ndt_nodes-design.md. Notice how design documentation is located within the associated package. Open this file using your favourite editor (vim, nano, gedit etc.), fix the error and save.
To incorporate the fix into the generated documents, build the documentation by running this command from the AutowareAuto folder: docs/.doxygen/build.py. You can preview the changes made to the documentation by navigating to /home/$USER/adehome/AutowareAuto/docs/_build/html/index.html in your favourite browser.
Once the relevant files have been updated and saved to your local branch, it’s time to add and commit the changes to the branch in your local copy:
- Stage the updated file for commit:
git add src/localization/ndt_nodes/design/ndt_nodes-design.md. If you rungit status, the file should appear in green text. - Commit the staged files:
git commit -m "[#1214] Fixes incorrect terminology."or alternatively usegit commit -m "Fixes incorrect terminology. Closes #1214". Notice that the message states the ticket number to be closed by this commit.
The changes are still only on your local copy of the repository and not on Gitlab, where a merge request can be created.
Synchronising upstream
To bring the master branch on your local forked copy up to date with the master branch of Autoware.Auto, perform the following steps:
- Switch to master branch on your local copy:
git checkout master - Get the latest code from Autoware.Auto:
git fetch upstream - Merge the master branch of your local copy with Autoware.Auto’s master branch:
git merge upstream/master
Next, bring the recent changes from the master branch into the branch you created:
- Switch to your working branch:
git checkout 1214-ndt_nodes-doc-terminology-fix - Ensure that your branch will apply cleanly to Autoware.Auto’s master:
git rebase master
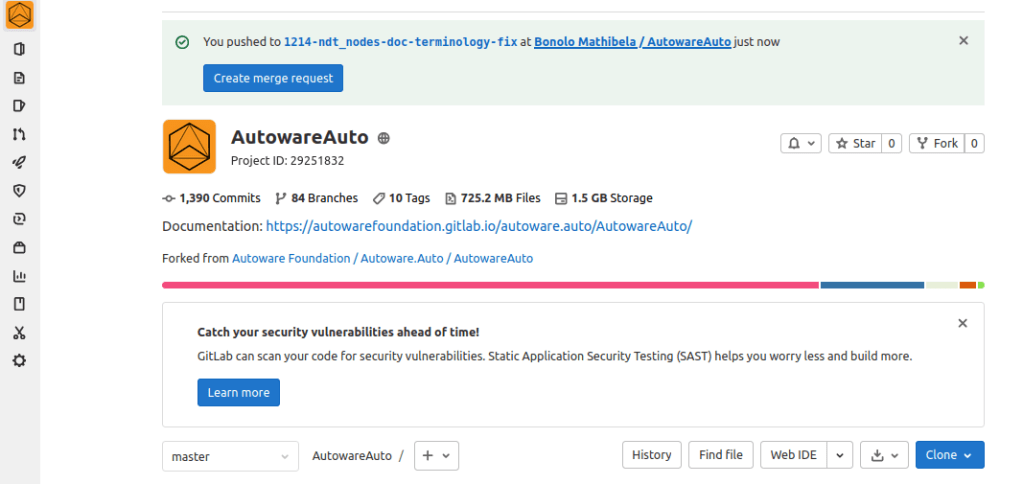
Lastly, send changes to the forked repository on Gitlab.com: git push origin 1214-ndt_nodes-doc-terminology-fix (this will push your local commits to the 1214-ndt_nodes-doc-terminology-fix branch of your forked repository in Gitlab and will be visible online). Gitlab prompts you with a direct URL link for creating the merge request online as shown below.
The feature branch workflow summarises the steps for working with branches in Gitlab.
Creating a merge request
Now that the documentation bug is fixed, it’s time to merge upstream (into Autoware.Auto project). To do this, create a merge request in Gitlab by clicking on the Create merge request button as shown above (this will open a New merge request page as shown below).
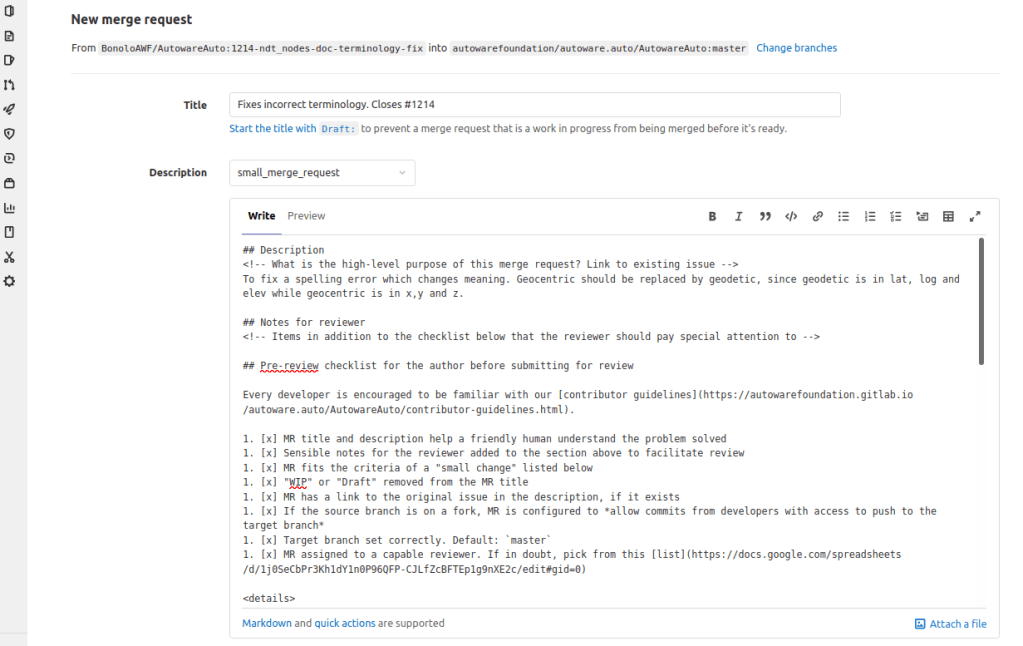
The merge request Title box will contain your commit message. For the Description select “small_merge_request” and complete the template including the pre-review checklist for the author (remember to assign an appropriate reviewer). The Source branch is <your-gitlab-username>/AutowareAuto:1214-ndt_nodes-doc-terminology-fix and the Target branch is autowarefoundation/autoware.auto/AutowareAuto:master. Click the Create merge request button to merge this contribution upstream. A new merge request has been created as shown below.
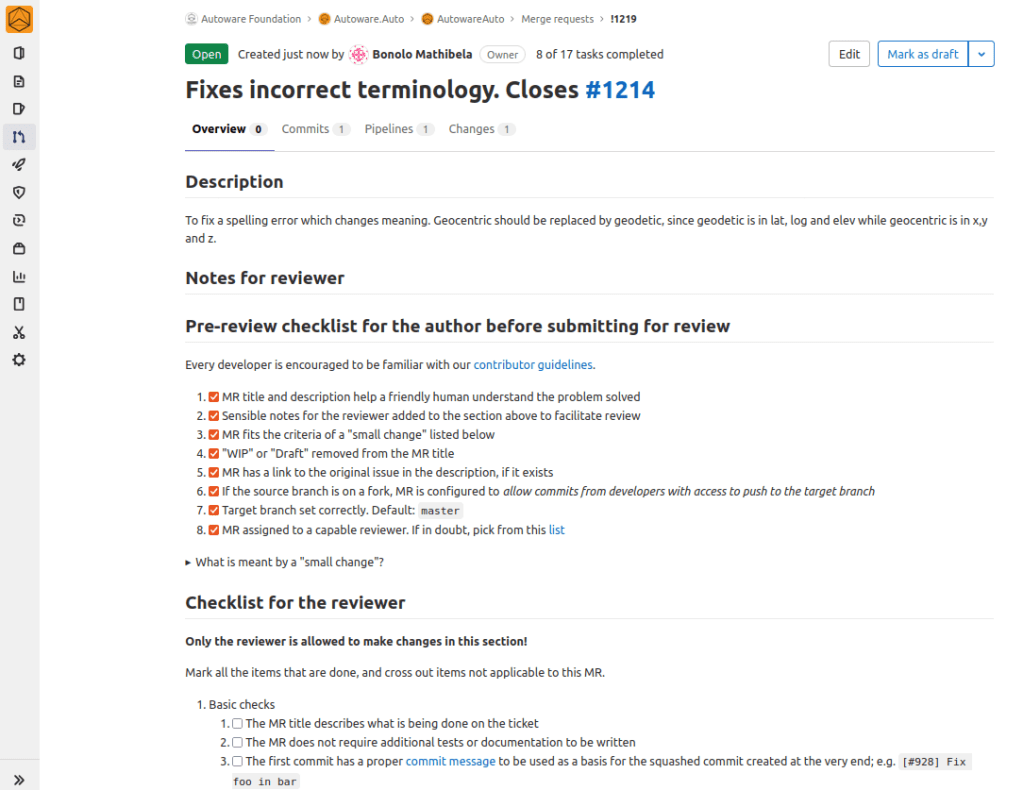
Notice that the CI pipleline automatically starts running for this new contribution. The reviewer will look through the changes, go through the reviewer’s checklist, and approve the review when satisfied. Any concerns can be addressed in the comments thread of the merge request. The thread must be resolved before the merge can be completed. If the reviewer requests further changes, you should perform the steps listed in the Synchronising upstream section above.
Merging changes upstream
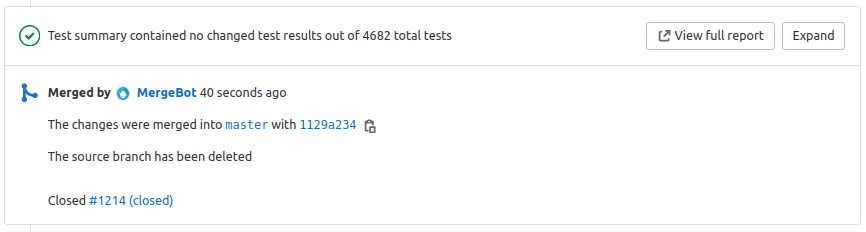
Once the reviewer has approved the merge request (and completed the checklist for the reviewer), complete the post-review checklist and assign the merge request to @merge-bot (this will automate the merging process). When the CI pipeline passes, the merge request will be merged and the ticket (Issue) associated with it will close automatically as shown below.
If the pipeline fails @merge-bot will report this and unassign itself. The pipeline can fail for several reasons such as an error in your code (unlikely for such a small change) or a problem with CI. You may need to rebase and try again.
Ways to contribute
Contributing to open source projects can take on many forms: sharing CAD files for manufacturing hardware, managing teams, writing documentation, coding new features, fixing bugs, organising community events, and donating financial or legal resources to a project. Although this tutorial focuses on fixing documentation, the same principles apply when adding files or making code changes. Just make sure to follow the coding guidelines for the specific open-source project you are working on.
Have fun making open source contributions!
