The legacy Intel RealSense cameras such as the R200/F200/SR300/LR200/ZR300 can be challenging to work with because support is limited. Documentation is sparse, so this tutorial provides a step by step guide for installing librealsense and pyrealsense for running the older RealSense R200 camera in ROS or natively in Python.
Install librealsense
The first part of this document describes what dependencies are required for librealsense.
- Update your packages using:
sudo apt-get update && sudo apt-get upgrade - Install the dependencies using:
sudo apt-get install libusb-1.0-0-dev pkg-config libglfw3-dev libssl-dev libgtk-3-dev - Download librealsense from Github, making sure to use the correct tag for the legacy branch:
git clone --branch v1.12.1 https://github.com/IntelRealSense/librealsense.git --depth 1. Inside this repository create a build directory and from there runcmake .. -DBUILD_EXAMPLES:BOOL=truefollowed bymake && sudo make install. The librealsense library will be installed in /usr/local/lib, the header files in /usr/local/include and the example executables are stored in /usr/local/bin.
Apply the kernel patch
The scripts for the kernel patch (in this case, for Ubuntu 16.04 LTS) are provided as part of this librealsense2 Git repository.
- If UIEF secure boot is enabled on your computer, disable this from BIOS. This is required in order to apply a kernel patch for the video driver.
- To patch the kernel first download the librealsense2 development branch repository from Gitbub using
git clone https://github.com/IntelRealSense/librealsense.git. Then run the udev rules script provided using./scripts/setup_udev_rules.sh. - Finally build and apply the patched kernel using the script supplied in the librealsense2 repository:
./scripts/patch-realsense-ubuntu-lts.sh. This script attempts to insert the patched uvc module instead of the active one. - Run modprobe using
sudo modprobe uvcvideoand examine the installation usingsudo dmesg | tail -n 50 - Restart the computer and remember to enable secure boot
Note that only the librealsense (not librealsense2) libraries are compiled and installed. The kernel is patched using the scripts contained within the librealsense2 repository. Unfortunately librealsense2 and realsense-viewer are not supported on older cameras.
Add ROS support
The official ROS Wrapper 2.0 for Intel RealSense does not support legacy cameras like the R200. The realsense_camera package has a node for publishing the camera data using the librealsense library. To install realsense_camera simply run: sudo apt-get install ros-kinetic-realsense-camera. This will be installed to /opt/ros/kinetic/share/realsense_camera on an Ubuntu machine.
Launch R200 in ROS
To run the camera in ROS, simply launch the nodelet and visualise the topics in RViz:
-
- Check that the ROS camera nodelet is installed:
roscd realsense_camera. The launch folder contains several r200_nodelet*.launch files for running the camera. - Run the realsense camera nodelet for RGBD data streams:
roslaunch realsense_camera r200_nodelet_rgdb.launch & - Publish a static transform from camera_link to map frame:
rosrun tf static_transform_publisher 0.0 0.0 0.0 0.0 0.0 0.0 map camera_link 100 & - Visualise the pointcloud, IR and RGB data streams in RViz using the provided config file:
rosrun rviz rviz -d $(rospack find realsense_camera)/rviz/realsenseRvizConfiguration1.rviz
- Check that the ROS camera nodelet is installed:
A screen shot of the visualation in RViz, showing the 3D point cloud, IR image, RGB image and depth image is shown below. A coloured point cloud is also available on the /camera/depth_registered/points topic.

R200 camera visualised in RViz
Add Python support
The librealsense library contains examples of running the camera directly in C/C++. There is however a Python wrapper named pyrealsense that is also available on PyPI as pyrealsense 2.2. Begin by installing the dependencies using: conda install pycparser cython numpy. Next, to install pyrealsense within a conda environment run this command in terminal: ~/anaconda3/envs/my_env/bin/pip install pyrealsense==2.2 replacing my_env with the name of your conda environment.
Launch R200 in Python
The examples folder in the pyrealsense Github repository shows examples for running the camera with matplotlib, VTK, and OpenCV libraries for visualisation. Make sure that these dependencies are installed:
- Install OpenCV for image processing:
~/anaconda3/envs/my_env/bin/pip install opencv-python - Install Matplotlib for plotting
~/anaconda3/envs/my_env/bin/pip install matplotlib - Install VTK for 3D visualisation from the conda-forge channel
conda install -c conda-forge vtk
A screenshot of the camera data when running the show_matplotlib.py file reveals that the default quality for the colour stream is poor.
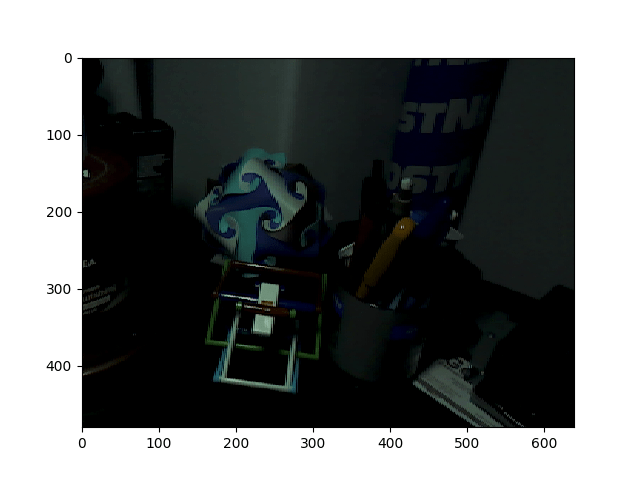
Matplotlib plot of the R200 colour stream
Two screenshots obtained from running the show_cv2.py and show_depth.py files show the color and depth image streams with varying accuracy. The parameters (gain/exposure) for the depth stream are the defaults (not optimal).
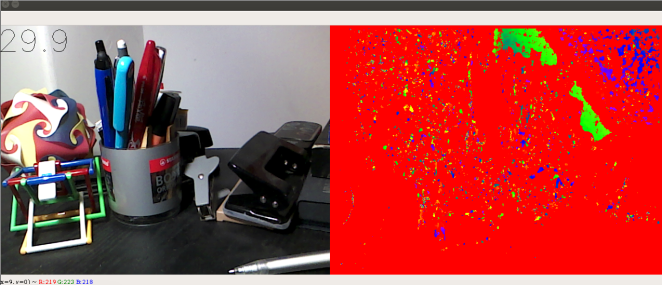
Visualising the R200 colour and depth streams in OpenCV

Visualising the depth stream in OpenCV
The last screenshot below shows the pointcloud displayed when running the show_vtk.py file:
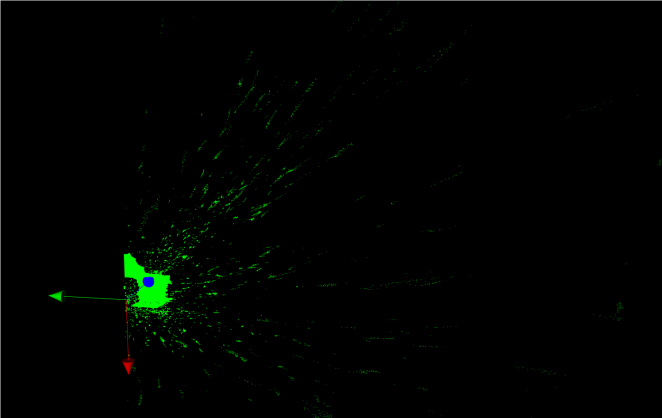
Visualisation of pointcloud in VTK
Troubleshooting
To check whether a USB port can detect the camera run dmesg -wT in terminal (with the camera unplugged), then plug it into a USB port. It should immediately detect an input called “Intel RealSense 3D Camera R200” The RealSense cameras require a USB 3.0 connection (a simple visual check is the blue colour inside the port).
If the ROS nodelet crashes, simply kill rosmaster, killall -9 rosmaster , before restarting the nodelet.
