The RealSense cameras are widely used on robots which often have to venture outdoors. Using any camera outdoors can pose some challenges with glare from sunlight. The RealSense D435 camera’s default settings work quite well outdoors. This is however not the case for the older R200 cameras. This tutorial outlines how to optimise the R200 camera for outdoor use, and set this up in ROS.
Adjusting the camera parameters
The official librealsense library provides a nice visual tool, called cpp-config-ui, that can be used to adjust the camera parameters on the fly and see the effect. The cpp-config-ui GUI is similar to realsense_viewer, available with librealsense2.
To run the viewer first plug in the camera then open terminal and cd /usr/local/bin followed by ./cpp-config-ui to run the binary.
The screenshot below shows cpp-config-ui running on default settings outdoors. It’s easy to see that the infrared (IR) streams are over saturated thus the stereo reconstruction (which is derived from the IR via pattern projection) fails.
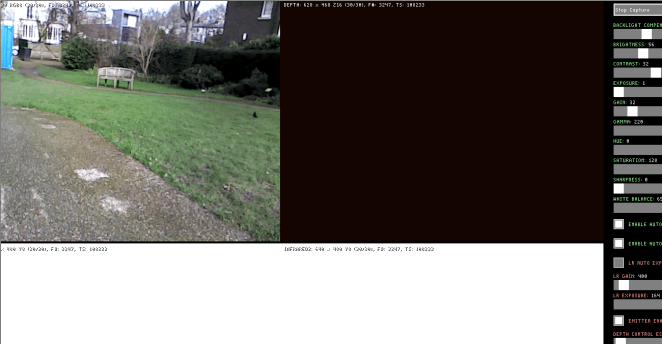
RealSense R200 running outdoors with default settings
To fix this, we need to adjust the settings of the IR cameras. The image below shows the settings available and the difference made simply by turning off IR auto exposure.


The ideal settings will depend on your application. For an overcast morning, disabling LR auto exposure and emitter, setting the LR gain to 100 (default 501), and the LR exposure to 91 (default 164) produced the result shown below.
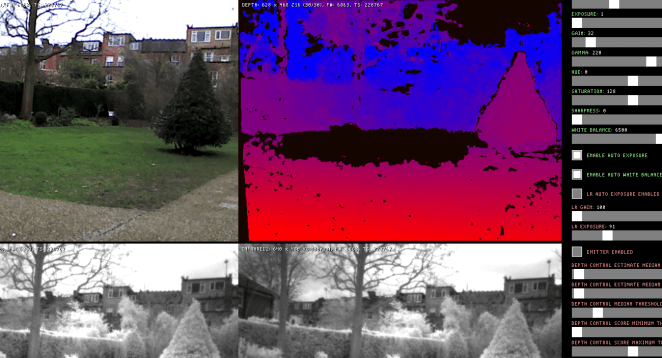
Running the RealSense R200 camera outdoors with optimised settings
With the optimised camera parameter settings, the IR stream is visible alongside the stereo reconstruction. A point cloud of the outdoor scene will thus also be available.
Loading camera parameters in ROS
Now that the (almost) ideal parameters have been extracted, the final step is to set them up using the ROS realsense_camera package. The realsense_camera_nodelet has a long list of dynamically reconfigurable parameters that can be set. Dynamically reconfigurable parameters can be adjusted while the ROS node is running without having to restart it. The changes to make are as follows:
- r200_lr_gain = 100 (default: 400)
- r200_lr_exposure = 91 (default: 164)
- r200_lr_auto_exposure_enabled = 0 ( default: 0)
- r200_emitter_enabled = 0 (default: 1)
- r200_dc_preset = 0 (default: 5)
First create a camera.yaml file containing the parameter settings:
r200_emitter_enabled: 0
r200_lr_auto_exposure_enabled: 0
r200_lr_exposure: 91
r200_lr_gain: 100
r200_dc_preset: 0
To load the parameters simply run dynamic_reconfigure from a terminal:
rosrun dynamic_reconfigure dynparam load /camera/driver camera.yaml
When dynamic_reconfigure runs and the RealSense camera nodelet is running, the updated parameters will be loaded. To check that the parameters are updated simply run rosrun dynamic_reconfigure dynparam get /camera/driver to list all the parameters and their associated values.
The RealSense R200 camera is now ready for outdoor use.
